Tuesday, 31 May 2011

The name badge

It was just a name badge for Scrap-a-Mia, nothing to get stressed over really, yet it had me in knots again, just like last year.  Some people are so creative and mine just felt pathetic in comparison last year but I did actually learn a lot.  This year was much the same except that this time I knew there would be some incredible creations. Last year we all got sent different chipboard shapes to play with.  This year we had different mediums but the same scalloped oval shape.  Mine was made from Ten Second Studio metal which is basically extra thick tin foil that you can colour and emboss etc.  I had a few disasters with it, embossing on the wrong side, ink that wouldn't adhere, ink that went a foul colour etc.  I was really stressed as I really wanted to do a good job with it this year and show some evidence of crafting development and it looked worse than the year before.

I was thinking that I would need to make something that wasn't a name badge to wear and then I remembered that I had seen something on a blog somewhere which didn't register at the time sadly.  I'm so sorry that I can't remember where I saw the idea and I can't credit it but I think it was someone from WOYWW.  Someone had kept their child busy with making a pen pot from a tube and I thought I could perhaps do something like that.

I started with this rock salt canister which I stole retrieved from the kids junk modelling box.  It's pretty sturdy and has a plastic bottom which makes it easier to upcycle than a loo roll tube.

I cut it down on the slope (not really that obvious from the photo) and painted the top and bottom edges for a neat finish.

Then I chose some lovely paper which I have loved for ages but found it tricky to use on a scrapbook page and I rolled it around the canister, marking where to cut on the slope, and adhering it with double sided tape (the extra strong one in my ATG).


Then I cut the foil into butterflies on my die-cutter and had a fun time tarting the whole thing up with gems and skeleton leaves.  I distressed and inked inside the rim with a make-up sponge to give it a good finish and added a couple of bows.    You can see the close up of the butterfly here with all its many layers of embossing and inks.  Thankfully the ink only properly adhered in some of the creases so it looked quite grungy and funky in the end.


For the name part (which I almost forgot as I got carried away with my embellishment!)  I used a tag (from Tesco or somewhere like that) and searched for some suitable letter stickers.  I came across a pack of Motifications which I had bought way back when, not realising what they were.  They're adhesive on both sides so you can add flocking or glitter or embossing powder.  They are pale pink (hence me buying them when I had B!) but luckily I had some flocking powder from some goody bag or other from years ago.

So.  I made something purple.  LOVE.
I made something out of a paper I love that was going to waste.  LOVE.
I used some old products.  LOVE.
I recycled something.  LOVE.
I used new techniques.  LOVE.
I had something completely and utterly different to everyone else, that looked good.  LOVE.
It is useful forever, not just for that one retreat.  LOVE.

And more than anything, I loved it and I was proud of what I had made.  HUGE LOVE!

Don't forget it is WOYWW tomorrow and it is PiF day for the 2nd anniversary.

Bye for now xx

Sunday, 29 May 2011

4x6 photo love for April

I am really loving the challenges over at 2 Peas, including the 4x6 photo love that is run by Shimelle.  Each month she produces a sketch and layouts for standard sized 4x6 photos, with the number of photos corresponding to the months, hence April was 4 photos.  We have a month to complete them to be in with a chance of the prizes so I am cutting it fine today as is closes tonight.


I used up some American Crafts paper that I wasn't sure about, and some of the Twitterpated range.  I also used, as you can see, a whole load of Thickers on the title.  Normally I would hyperventilate about using so many precious letters but I am trying to actually use my stash and not just keep it and stroke it :-)


There are quite a mix of embellishments here - a Sassafrass cloud, a Dear Lizzy tree,  Papermania buttons, a Jenni Bowlin ticket and the first of many of those stick pins I mentioned yesterday from E-Bay.  I got 90 pins for £2.75 - result!  Of course they are not Jenni Bowlin quality, but who cares for that price?!


As April has 4 photos, one of them is under the title flap.  This layout is about B trying desperately trying to get L's Fruit Flakes off him after she had eaten all of hers.  They started off sitting side by side and ended up turned completely around as she was climbing all over him and he was gently turning away.  They were so sweet and so funny that I thought I could get away with some cutesy papers.  The photo that is hidden under the flap is how they ended up.  The title comes from a family saying that originally came from some nursery school or other.

I'm really pleased with this for a couple of reasons, the main one being that I made the flap!  I could have just put the whole thing in the page protector and left it at that as several others are, it just means that you have to slip them out before you see the interactive bit.  This time however, I used Shimelle's tutorial to make a split in the protector so I could feed the flap through and you don't need to take it out to open it.  It all came together really quickly (other than the embellishing parts!) so I'll definitely use this technique again when I have a lot of photos to show.

I also thought I would share my notebook with you as Gem asked about it the other day (sorry Gem, I mean't to reply sooner).  I made it to take to Scrap-a-Mia last year and it is where I keep all my jottings of ideas and lists of things to create etc.


It is just a cheap spiral bound notebook made of kraft card which is a bit unusual and I wish I could remember where I got them from now.  So often cheap notebooks are covered in that thin shiny paper in bright colours but these ones here were great for tarting up.  I used some of my very favourite things on it - vellum, butterflies, Dear Lizzy music paper, pink gems, and that lovely little envelope embellishment.   I used Ranger Crackle Glaze on the chipboard corners but it didn't adhere well at all.  I have yet to find somewhere where it does stay put :-(


And the back view.  I used Stickles on the butterflies' edges to add a bit of sparkle.


Now I must get on with my PiF for WOYWW which hasn't really progressed at all, oopsie!

Bye for now
xx

Friday, 27 May 2011

A layout from a sketch

Firstly, please forgive me if this post goes awry.  We are having cavity wall insulation fitted and the drilling is going right through me!

So this week I took a little break from my Scrap-a-Mia projects and joined in with Kirsty Wiseman's Sketch.  If you haven't come across this before, every other Wednesday, Kirsty posts a sketch on her blog around 8pm and then scraps live on Ustream.  Some people scrap along with her, others just come and watch and chat.  I learn something every time I watch her, be it a technique or a cheaper way of buying something.  This week it was both and I now have a nice pile of those beautiful stick pins on their way to me for a couple of quid!

So this week I managed to follow the sketch fairly closely.  I had a few piles of photos to hand and I broke into my DCWV stack which I'm not sure I like.  It worked okay for this layout though (I think!)


 I've been meaning to try those lovely twisted ribbon roses for ages so I used those here.  One kept unravelling and is probably a snake of flat ribbon in the page protector as we speak but mostly it was fine.

Its a good way of using up ribbon that isn't to your liking as the pattern is fairly hidden, or you can use strips of fabric.  While sorting out the washing this morning, I have had to ditch another couple of L's school shirts (seriously I think they use him as a floor mop) but as they are a grubby white, I think I might try and spray them to use as these roses again - look at me upcycling!


And talking of upcycling, see that teeny tag there?  It says £2.50 on the back.  It was the price tag from a metal heart I bought last week - I keep so much "rubbish" these days!

Today I'm working on my PiF for WOYWW as it is the 2 year anniversary next week.  I wasn't going to join in because I don't really make things but I thought I ought to try.  Getting something handmade, from someone else you've never met, just because they want to make you happy, seems like a wonderful thing to do doesn't it?

Have a great weekend, bye for now xx

Wednesday, 25 May 2011

WOYWW 103

Yikes I'm still in such a fug after Scrap-a-Mia (and being in Wales for the rugby but we won't talk about that :-( )!  I did manage to have a bit of a sort out so I could see what needed doing.  So now I have a pile for each of the unfinished projects as well as a pile of things to put away including all my lovely stash that I got while I was there.  Also this morning there were a couple of sheets of card where I have been testing my inks... and I blame Dina Wakley entirely for this new obsession!
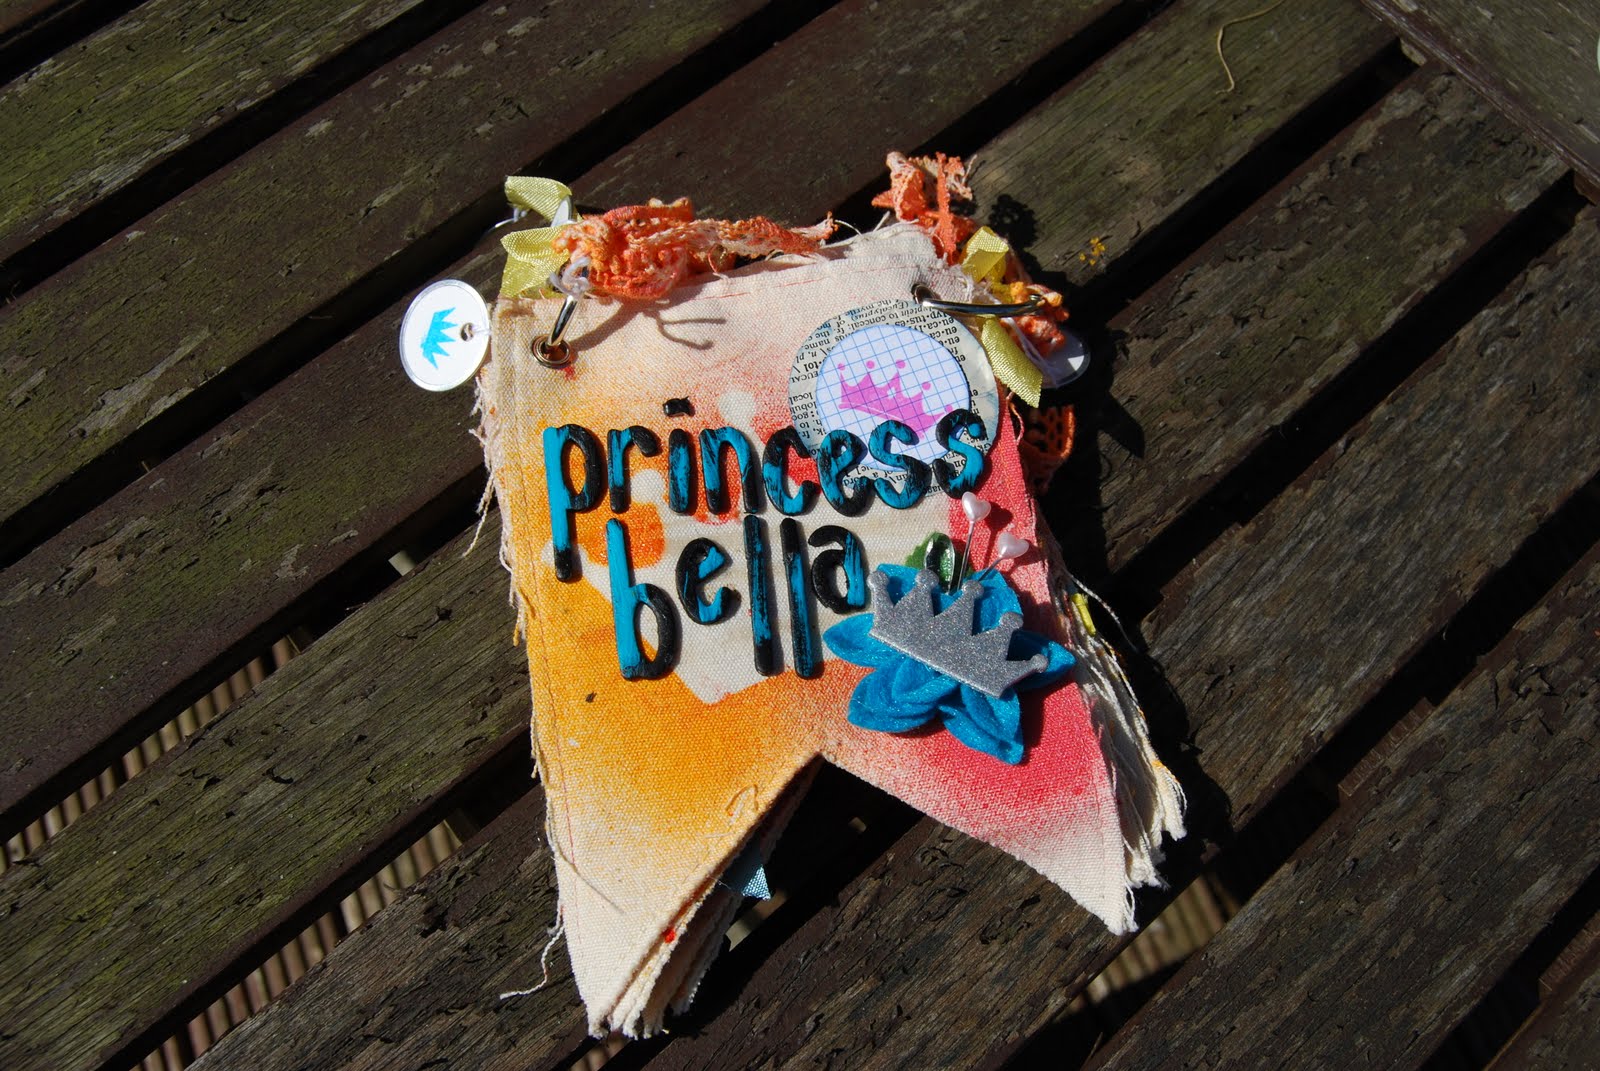
The next project to complete is that large H with all the twiddly bits on but firstly I decided to start with the thing that needed the least work to complete it which was Dina's canvas mini-album.  This was our first class of the retreat and it was WAAAAY out of my comfort zone, which is part of the point of these things for me.

 Many months ago I decided to give misting a go and did it outside like I was advised.  Of course, me being me, didn't check what the wind was doing and so it blew back in my face and made me look like I had a hideous disease.  And then of course, a couple of weeks ago, there was this messy layout which I'm still not sure about.  To start with a class that was all about misting and paint flicking was really throwing me in the deep end!  Dina was brilliant though and guided me through getting inky and messy.  And you know what, I had fun!

 My hands were grim by the end of it but Dina calls them happy hands and she was right.  We used a mask that we cut from good old paper which made me think of misting as being a bit more accessible.  Then we let loose with Dina's masks and we were all just blown away by the results.  Sometimes we'd be a bit "hhmm I dunno" and she would come past and say "oh wow!" or "so cool" and we started to realise that this was just the beginning.

 The more bits we added, the more fabby it looked.  We had little silver die-cut crowns, journalling labels, stick pins, crown stamps, dress making paper, ribbon, and our photos obviously.
 We used the mists to make the backgrounds so sometimes you get only a sneak peek, and we dyed the lace for the ties with the mists as well so they looked grungy and shabby - I did grungy, well who knew?!  Imagine how stunned and how pleased I was when she held up my little book to show how I had arranged something!  Seriously, I fell in love with inks and canvas so much that I have since bought several more!

I still need to do the journalling (just trying to find the right words) but this morning was all about getting messy with paint splats.  Oh how I wish Dina was here to old my hand today!  I decided just to do it on the cover in the end.  I used the wrist flick method and the toothbrush method.  Naturally I got more on me than on the mini-book but hey, its about the art right?


And here is where I did it all, the rickety wooden table outside my craft room.  I didn't bother to clean the table afterwards and I have decided to let it show off my arty antics.  We will see how it progresses!
Thanks for looking at my craft space today.  Want to see more?  Head over to Julia's blog for a full list of other desks you can have a nosy at.  I hope to visit lots today as B is at nursery for the first time...

Bye for now xx

Wednesday, 18 May 2011

What's on your workdesk Wednesday 102


Yikes, time is marching on so fast right now!  I had such a great time at Scrap-a-Mia but I have yet to try and even sort through all the half finished projects.  I'm still catching up on life and organising a 5th birthday party and planning our day trip to Wales for the rugby at the weekend.

So basically that big pile in the middle and off to the right is all stuff from the weekend.  On the corner and just in front of the black bag are the layouts from Emma Trout's class (almost finished) and most of the pile in the middle is the barely started 3D project from MJM.  I'll probably do that last as it is going to be a labour of love and I need to work up to it!

Right back to those party invitations....

Don't forget to check out all the other crafty desks at Julia's Stamping Ground.

Bye for now xx

Sunday, 15 May 2011

Returning from Scrap-A-Mia

Oh my goodness I am so tired.  My head is full, my purse is empty and my hands are an inky mess but I had SUCH a ball!

We all signed this huge canvas that one of the teachers, Celine Navarro, misted for us. Creative Moments are going to keep the canvas as a reminder of the fantastic weekend.


The venue was here, the New Place in Wickham, which is in between Portsmouth and Southampton.  We were in conference facilities just behind this beautiful building but the grounds are lovely.


Two of the classes involved misting in a big way which was fantastic as it was something new for me.  There were so many colours and brands and masks to try that would be impossible at home but boy did I get in a mess!  I have a couple of mists but I've always been too scared to try them.  I used them once ages ago and I got in a mess but Dina Wakley was great and helped me to embrace the random effects and the mess.


 The strangest project of the weekend was a 3D construction with Michelle Mogford-Jackson which involved a LOT of cutting with a craft knife.  We got messy again here with Luminesce paints and Stazon inks.  It was an ambitious project and I hope I can finish it because it looked fab.

And I'm afraid that's it for today.  No finished projects to share, just a a couple of sneaks to tease you with.  Hopefully I will have a couple of completed things to share by the end of the week if I can manage to recover my brain.  I think it is in my craft bag somewhere....

Bye for now
xx

Friday, 13 May 2011

Two more NSD challenges

Hurrah!  At last Blogger is back up, I was twitching with the withdrawal!

I have 2 layouts to share here, both were challenges for National Scrapbooking Day on Shimelle's blog.

This one is "A story behind the photo".

I called this "1 Photo" as it is the only picture I have of my being pregnant with our first baby Sammy.  I was 6 weeks pregnant in this photo and we were visiting friend's in France on the way to a rugby match in Toulouse.  I started to get morning sickness while we were there and I found it hard to find anything to eat that I either fancied or could have.  That was over 6 years ago and we've not visited France since and I still can't stomach the thought of anything that reminds me of the food on that trip.  Sadly at almost 16 weeks a scan showed no heartbeat.  Without any warning all our hopes and dreams exploded in front of us.  Our baby girl had various problems with her brain development and another problem called exomphalos which is a defect in the abdominal wall.  We were able to hold our little girl and she has a little grave in a special baby area where people are able to put toys and windmills etc.  Since then we have been blessed with 2 wonderful children but Sammy will always be part of our lives.  She was obviously very tiny and her little face looked like the man in the moon so I always think of her when the moon is full.

 My mother-in-law sent us sunflowers after we lost Sammy and they became a symbol of her, both in the time of year and with the sunshine that she had brought on us.  We wrote her a letter to go with her and addressed it to Sammy Sunshine so the sun and moon are constant reminders that she is with us and I wanted to include something on my layout relating to that.  I bought the 2 different French papers with this photo in mind but I wanted to put some pink and some sunshine on it too.  The journalling, when I work out what I want to say, will go in this cool little envelope, called a Scrap-a-lope.

I tried to join in with Kirsty Wiseman's online crop sketch but I was forcing the photo and the papers and it wouldn't work.  I kept the idea of the twiddly bit down one side and of the strips though and I'll use the sketch more closely at another time.

The second layout was completed at one of Paula's classes.  This is the one where I was struggling to find the right papers the other day.  I'm actually really pleased with how it turned out in the end so once again I've started with something I didn't think I would like and ended with something I love.  Luckily it also fits with another of Shimelle's challenges from the weekend, "a border between two photos".

I flocked the title, which could be neater, and I embossed the dragonflies.

I also used some of that lovely aqua fibre ribbon which is yummy but a bit messy!

You can see the finished article with whatever I come back from Scrap-a-Mia with, hopefully on Sunday evening if I'm not too wiped out.  And on that note, I had better get some sleep.  This weekend is going to be full on!

Bye for now
xx